Most WordPress donation pages don’t show how many people are already giving. And when supporters feel like they are the only ones donating, they are less likely to follow through.
Donor leaderboards solve this by showing real support in action. When people see others donating, then they feel more comfortable supporting your mission, too.
Plus, it’s easy to set this up on your website with the right donation plugin.
In this guide, I will show you how to create a donor leaderboard in WordPress to recognize your supporters and grow your nonprofit.

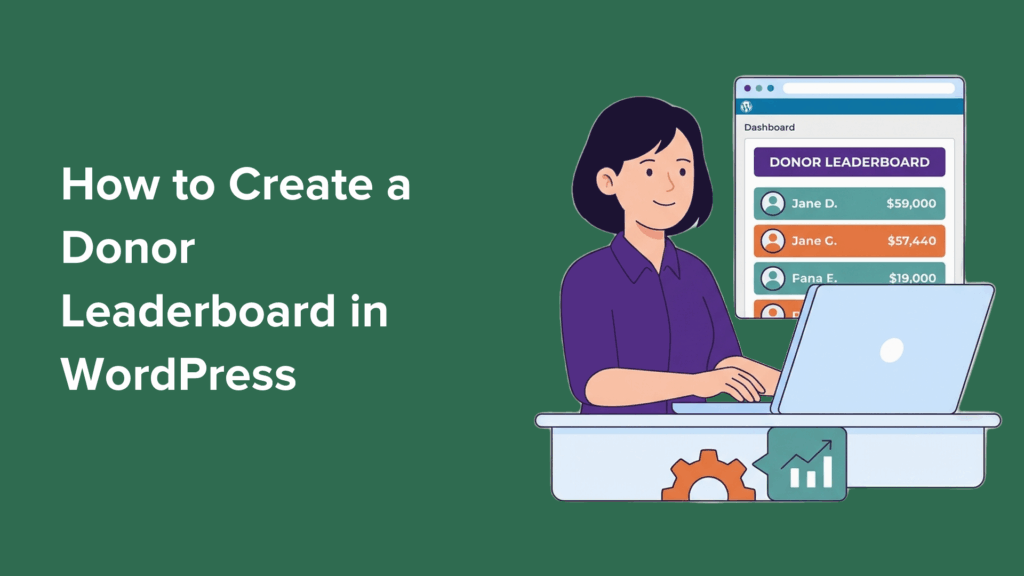
Why Create a Donor Leaderboard in WordPress?
A donor leaderboard builds social proof and encourages people to give by showing real-time community support. Seeing others donate makes new visitors feel more comfortable and motivated to join your mission.
In fact, research shows that 74% of donors can be motivated to give more or donate outside their usual schedule when they feel compelled by a strong reason. Seeing real people give — especially when their generosity is acknowledged — can be that extra push.
Plus, highlighting top donors on nonprofit websites doesn’t just celebrate their generosity. It also builds momentum for fundraising campaigns.
You can explore more insights in our nonprofit research guide.
Here are some key benefits of adding a donor leaderboard to your WordPress site:
Now, I’ll walk you through how to set up a donor leaderboard in WordPress. Here’s everything I’ll cover in this guide:
Step 1: Install and Activate the Charitable Plugin
WP Charitable is the best WordPress donation and fundraising plugin. It lets you set up campaigns and show donor information professionally without charging platform fees.
We use Charitable to manage donations on the Balkhi Foundation website. To read more about our experience, see our complete Charitable review.
Charitable makes it easy to set up campaigns, track donations, and display donor information in a professional way. The Donor Leaderboard feature is included in Charitable Pro and becomes available automatically once you activate the plugin.
First, you’ll need to sign up for a Charitable account.
On the Charitable website, click the ‘Get Charitable Now’ button, pick a plan, and follow the on-screen instructions to complete checkout.

💡 Note: If you want to try Charitable before purchasing, there’s a free Charitable version available in the WordPress plugin directory. However, the donor leaderboard feature is only included in the Charitable Pro version.
Upon signup, you’ll have your own Charitable account area, where you can find your plugin’s zip file and license key.
Now you can install and activate the Charitable plugin. Go to Plugins » Add Plugin in the WordPress dashboard.

Then, click the ‘Upload Plugin’ button at the top of the page.
Next, click ‘Choose File,’ select the Charitable zip file you downloaded, and click ‘Install Now.’

Once the installation is complete, click the ‘Activate’ button to enable the plugin on your site. For details, see our guide on how to install a WordPress plugin.
After activation, you’ll need to enter your license key to unlock all the Pro features, including the donor leaderboard.
Head over to Charitable » Settings and simply paste your key into the respective field. After that, you can click the ‘Verify Key’ button.

With that done, you’re all set to create your first campaign.
Step 2: Create a Campaign with a Donor Leaderboard
Now that Charitable Pro is installed and activated, you can create your first fundraising campaign with a donor leaderboard.
This is where you’ll set up the campaign details, whether you want to create a peer-to-peer fundraising or crowdfunding campaign, and add the leaderboard feature.
To get started, go to Charitable » Campaigns in your WordPress dashboard and click the ‘Create Campaign’ button.

On the next screen, you’ll need to give your campaign a name.
Choose something clear and descriptive that reflects your fundraising goal, like “Annual Scholarship Fund,” “Community Center Renovation,” or “Emergency Earthquake Relief Fund.”
After that, you can pick a template that fits the style you’re going for. Don’t worry if it’s not perfect right away because you’ll be able to adjust everything in the next steps.
To use a template, hover over the box and click the ‘Create Campaign’ button.

Once you’ve selected a template, you’ll see the campaign builder interface. This is where you can drag and drop different elements to customize your campaign page.
From here, let’s look for the ‘Leaderboard’ field in the left panel and drag it into your campaign preview. You can position it wherever it makes the most sense for your layout – many nonprofits place it near the top to highlight donor support right away.

After adding the Leaderboard field, you can customize it to suit your site design.
The first thing you might want to set is the ‘View Type’. You can choose between a list view and a card view depending on your preference.

Next, you might want to adjust the following settings:
Number of Donors – Choose how many donors you want to display on the leaderboard.
Pagination – Turn this on if you want to split the list across multiple section pages. This is helpful if you have a lot of donors.
Order By – Decide how donors are sorted, such as by total donations, by most recent contributions, or by name.
I recommend starting with a smaller number of donors and enabling pagination. This keeps the leaderboard clean and easy to read, especially as your donor list grows.

After that, you can also choose how you order your leaderboard.
‘DESC’ (Descending) means the highest values appear first. This is the standard setting, so your top donors show up at the top of the list.
‘ASC’ (Ascending) means the lowest values appear first, so the list starts with smaller amounts.
This works the same if you choose ‘date’ or ‘name’ for your ‘Order By’.

Next, there’s the ‘Title Settings’ section, where you can edit your leaderboard’s:
Title – The main heading shown at the top of the leaderboard.
Description – A short message explaining what the leaderboard is about.
Top Contributors Title – The label used for your top donors.
All Contributors Title – The label used for the full donor list.
Remember, these settings are specific to the campaign you’re building, so you can customize the wording to match each fundraising goal or appeal.

There are also ‘Display Settings’.
You can enable and disable the following settings in your leaderboard:
Donor Gravatar
Donation amount
Donation count
Last donation date
Campaign name
Supporter level
You’ll also find a ‘Width’ slider, which lets you control how wide the leaderboard appears on the page so it fits neatly with your layout or page design.

Go ahead and test these settings until you’re happy with how your leaderboard looks.
When that’s done, it’s time to make your campaign live. Simply change the status dropdown from ‘Draft’ to ‘Publish’ at the top of the page.

Finally, click the ‘Save’ button to save all your changes. Your campaign with its donor leaderboard is now ready to be displayed on your WordPress website.
Step 3: Embed Your Campaign on Your Site
With your campaign created and the donor leaderboard added, it’s time to display it on your site. Charitable makes this process incredibly simple with its built-in embed wizard.
First, click the ‘Embed’ button in your campaign settings to launch the wizard, which will guide you through adding your campaign to any page or post on your site.

In the popup that appears, you can choose whether to add your campaign to an existing page or a new page.
For this guide, I’ll choose ‘Create New Page.’

In the next popup, you can give your new page a name. I recommend using something clear and descriptive, as this will become your page’s URL and affect how easily you can find it later.
After that, click ‘Let’s Go!’

This will take you to the WordPress block editor.
From here, let’s click the ‘+’ button to add a new block, then search for the ‘Charitable Campaign’ block.
When you see it in the search results, click on it.

Once you’ve added the ‘Charitable Campaign’ block to your content editor, you’ll see a dropdown menu where you can choose which campaign to display.
Select the campaign you just created from the list.

The block will show you a preview of how your peer-to-peer or crowdfunding campaign will look on the page, including your donor leaderboard.
If everything looks good, then simply click ‘Save’ or ‘Publish’ to make your campaign live on your website. Visitors can now view your campaign and see the donor leaderboard in action:

💡 Note: Since this is a new campaign, you might not see your donor leaderboard right away. This is normal – once donations start coming in, the leaderboard will automatically update and display your donors.
Alternative: Show a Donor Leaderboard Across All Campaigns
If you’re running multiple fundraising campaigns, then you might want to showcase overall donor support across your entire site. This approach highlights your most generous supporters regardless of which specific campaign they contributed to.
Charitable gives you two flexible ways to display a donor leaderboard that spans all your campaigns. Both methods are beginner-friendly and take just a few minutes to set up.
Let me show you both options so you can choose the one that works best for your website.
Option 1: Add a Donor Leaderboard Using the Block Editor
This method is perfect if you want to show top donors across all campaigns on a specific page or post. It works seamlessly with the WordPress block editor (also called Gutenberg).
Start by opening the page or post where you want to add your leaderboard. Then, click the ‘+’ button and search for Charitable’s ‘Donor Leaderboard’ block.

After adding the block, you’ll see several display settings in the right panel.
The ‘View’ dropdown lets you choose between ‘List/Table’ and ‘Card’ layouts – pick whichever style matches your site’s design better.

In the ‘Campaign’ dropdown, select ‘All Campaigns’ to show donors from across your entire site.
If you prefer to show only donors from a specific campaign, then you can select ‘Current Campaign’ (if you only have one running campaign) or the campaign name instead.

Use the ‘Number of Donors’ slider to adjust how many donors appear on your leaderboard.
You can also enable pagination if you want to show visitors additional pages of donors.

The ‘Display Options’ section lets you choose what information to show for each donor.
You can include their avatar, donation amount, total donation count, last donation date, last campaign they supported, and their supporter level.

Under ‘Title and Descriptions Settings’, Charitable gives you a default text, so it’s all set.
But you can customize the heading and add any explanatory text to match your brand.

For the list view, you can add a trophy icon, and for the card view, there’s a crown icon option to make top donors stand out.
You can even adjust border colors to match your site’s design.
Once you’re happy with how everything looks, click ‘Save’ or ‘Publish’ to make your donor leaderboard page live.
Here’s what it looked like on my demo site:

Option 2: Add a Donor Leaderboard Using a Shortcode
This method is ideal when you want to add your donor leaderboard to sidebars, widget areas, or page builders. Shortcodes give you more flexible placement options across your entire website.
To get started, go to Appearance » Widgets in the WordPress dashboard.

Then, find the location where you want to display your leaderboard – this could be a sidebar, footer area, or any other widget-ready section of your site.
In your preferred location, add a new ‘Shortcode’ block or widget.

Then, paste this shortcode into the block:
[charitable_donor_leaderboard]
Here’s what it might look like on your screen:

💡 Note: The widget area supports the Donor Leaderboard block, which you can use instead. However, in this method, we’ll show you how to use a shortcode.
The shortcode method is particularly useful if you’re using a page builder like SeedProd, Elementor, or Beaver Builder. This is because you can easily drop the shortcode into any section of your design or a custom landing page.
This basic shortcode will display your donor leaderboard with the default settings. However, you can also customize it using parameters, which are small options added to the shortcode. This controls exactly how it looks and what it displays.
For example, if you want to show a card view with 12 donors from a specific campaign, you can use:
[charitable_donor_leaderboard view=”card” number=”12″ campaign=”123″]
Just replace “123” with your actual campaign ID. You can find this ID number in the URL address bar when you are editing a specific campaign (e.g., post=123).

For details, you can see our guide on how to add a shortcode in WordPress.
Once you’ve added the shortcode, click ‘Update’ to save your changes. Now, visit your website to see your donor leaderboard in action.

Bonus Tip: Create a Donor Portal in WordPress
After setting up your donation system, you may also want to improve the experience for returning donors. A donor portal makes it easy for supporters to manage their contributions without contacting you for help.
It gives them a secure place on your WordPress site to view their donation history, manage recurring gifts, and update their details anytime.

For your team, it also reduces admin work like resending receipts and manually updating records. Everything donors need is available in one convenient location that they can access whenever they want.
And when supporters have easy access to their information, they feel more connected to your organization and are more likely to continue giving.
The good news is that creating a donor portal is easier than you might think. For step-by-step instructions, see our detailed guide on how to create a donor portal in WordPress.
FAQs About Creating a Donor Leaderboard in WordPress
Here are some common questions readers ask about using donor leaderboards in WordPress.
Can I show a donor leaderboard for a specific campaign only?
Yes, you can display a donor leaderboard for a specific campaign in WordPress.
With Charitable, when you add the Donor Leaderboard block or use the shortcode, simply select the specific campaign from the dropdown menu or add the campaign ID parameter to show donors from that campaign only.
Can I control what information appears on the donor leaderboard?
Yes, you have full control over what information displays on your leaderboard. You can choose to show or hide donor avatars, donation amounts, donation counts, last donation dates, campaign names, and supporter levels through the block settings or shortcode parameters.
Will the donor leaderboard update automatically?
Yes, your donor leaderboard updates automatically in real-time whenever someone makes a new donation. You don’t need to manually refresh or update anything – the leaderboard will reflect the current rankings as soon as donations are processed.
Can I place the donor leaderboard anywhere on my site?
Yes, you can place your donor leaderboard virtually anywhere on your WordPress site. You can add it to pages, posts, sidebars, footers, or any widget-ready area using either the block editor or the shortcode method.
Does using a donor leaderboard actually help increase donations?
Yes, donor leaderboards can help increase donations by creating social proof and friendly competition.
When potential donors see others contributing, it builds trust and encourages them to give. Plus, existing donors may increase their contributions to improve their ranking or recognition.
Next Steps to Grow Your Nonprofit WordPress Website
Now that you’ve set up your donor leaderboard, you’re well on your way to building a stronger fundraising presence online. A leaderboard is just one piece of creating an effective nonprofit website that connects with supporters and drives donations.
To continue growing your nonprofit’s impact, here are some guides to expand your fundraising capabilities and reach more supporters:
If you liked this article, then please subscribe to our YouTube Channel for WordPress video tutorials. You can also find us on Twitter and Facebook.